
If you work in the IT industry or own a printer at home, you would have faced the problem of clogged printheads.
The clogging of ink in the printhead can happen for two reasons: first, the printer was not in use for quite some time, and second, the printhead was empty and dried for a while.
As an IT admin of the company, you may run the self-cleaning program from your system to clean the toner ink cartridge. However, that might not help in most cases, especially when the clogging in the ink printhead is heavy.
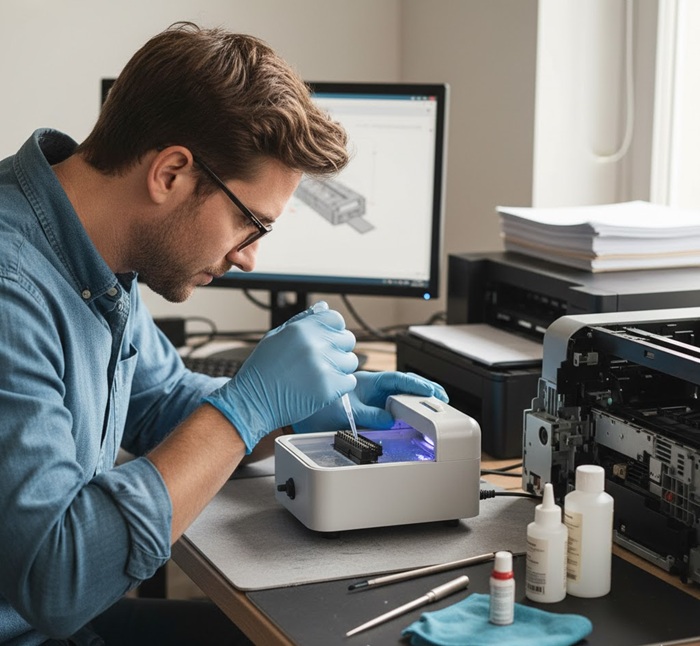
As a better alternative, you can now use an ultrasonic printhead cleaner device that can help you deal with clogged printheads in such difficult situations without costing an arm and a leg.
Can Ultrasonic Cleaners Unclog Printheads?
*At no extra cost to you, Ultrasonic-Cleaners.org may earn compensation, if you make a purchase through links on this page.
Ultrasonic printhead cleaner works on the principle of ultrasonics to help you clean the dry ink from every single inaccessible part of a clogged printhead.
If you do it carefully, ultrasonic cleaning can provide you with the most efficient results to unclog printheads.
But it’s important to choose a model with a tank size that can accommodate the entire printhead is ideal. This ensures thorough cleaning of all components, including hard-to-reach areas, without the need for repositioning.
The success of your cleaning project also depends on factors such as the severity of the clog, the type of ink used, and the duration and frequency of the cleaning process.
How to Use Ultrasonic Printhead Cleaner Correctly?
To start the ultrasonic printhead cleaning process:
- Fill the ultrasonic cleaner tank with enough water and solution (avoid overfilling the tank) and position the printhead at an angle.
- Switch on the device, set the temperature to around 25 to 30°C, and run the cleaner for 5 to 15 minutes.
- As the ultrasonic cleaning process starts, it creates thousands of tiny bubbles that implode with high energy, a phenomenon known as cavitation.
- These bubbles produce intense scrubbing action, reaching even the smallest and most inaccessible areas of the printhead.
- The process, when completed effectively, dislodges dried ink and debris without causing physical damage to the delicate components of the printhead.
After the washing, allow the printhead to dry thoroughly (use a clean, lint-free cloth or soft tissue paper for drying if required).
Then reinstall it in the printer. Test the printhead by attempting to print. If it still doesn’t work, further cleaning may be needed, or the electronic components may have deteriorated due to wear and tear.
What Kind of Cleaning Fluid is Best to Clean Print Heads?
Printheads are typically made from a combination of materials, including silicon, glass, ceramics, plastics, and various metals such as stainless steel and hard anodised aluminum.
Selecting the right cleaning solution and temperature is therefore crucial to achieving optimal results when it comes to using an ultrasonic cleaner for unclogging printheads.
Although pure, distilled water is good for cleaning the printer heads, you can use other components (such as soap detergent, isopropyl alcohol, or aqueous ammonia) mixed in water to make a tougher printer head cleaning solution.
These fluids will dissolve the dried ink residues better and act strongly to remove them with greater ease, making the cleaning process faster and much more efficient.
When using alcohol for cleaning the blocked printhead, make sure that you do not use it in a higher ratio. Also, do not use fluids like methylated spirits or any other flammable liquids to clean the print heads.
Due to its chemical composition, it’s corrosive and can damage the wire or electrical contacts in the blocked printer heads.
If there is still any doubt regarding the usage of print-head cleaning fluids, it’s recommended that you get in contact with your manufacturers, like HP, Canon, Epson, and Dell, to know the product that they recommend for cleaning their specific model.
Best Practices When Using Ultrasonic Cleaning for Printheads
The printhead is a component in the printer that helps in transferring the ink onto the page. In simple terms, it acts as the engine of a printer that works by spraying tiny droplets of ink through its nozzles to form the text or an image that’s being printed.
Be aware that the terms “ink cartridge” and “printhead” are used interchangeably in place of one another but these two are different. An ink cartridge is a unit that will contain the ink, whereas a printhead is a component in an inkjet printer that works to spray the ink onto the attached paper.
Using an ultrasonic printhead cleaner provides top-level cleaning compared to other cleaning methods. Not only printheads, but also you can clean resin prints, three-dimensional objects, and other models in 3D printing/ Stereolithography.
Most modern-day ultrasonic cleaners use water-based cleaning solutions (without the need for contaminated or toxic detergent-based solutions), making the process easy, quick, cost-effective, and environment-friendly.
However, there are a few standard protocols that should be followed to ensure effective and safe cleaning.
- Get your workspace ready by clearing any clutter and ensuring the area is clean and well-ventilated.
- Get a professional-grade ultrasonic cleaner (40kHz frequency minimum) with adjustable heat settings.
- Make yourself ready by wearing basic safety gear like gloves and eye protection.
- Place the ultrasonic cleaner on a stable, level surface near a power outlet.
- It’s also a good idea to keep a small container or tray nearby for safely handling the printhead before and after cleaning.
- Use cleaning solutions specifically designed for your ink type, ensure compatibility with your printhead, and adhere to the recommended cleaning durations for optimal results.
To determine if your printhead is suitable for ultrasonic cleaning, begin by identifying its type. Piezoelectric printheads, commonly found in Epson and certain professional printers, are generally well-suited for ultrasonic cleaning.
However, thermal printheads, typically used in HP and Canon printers, require more caution due to their heat-sensitive components.
Special care should be taken if your printhead contains built-in electronic circuits, comes with a manufacturer’s warning against liquid immersion, explicitly prohibits ultrasonic cleaning in the warranty terms, or is labeled as a “sealed unit – do not disassemble.”
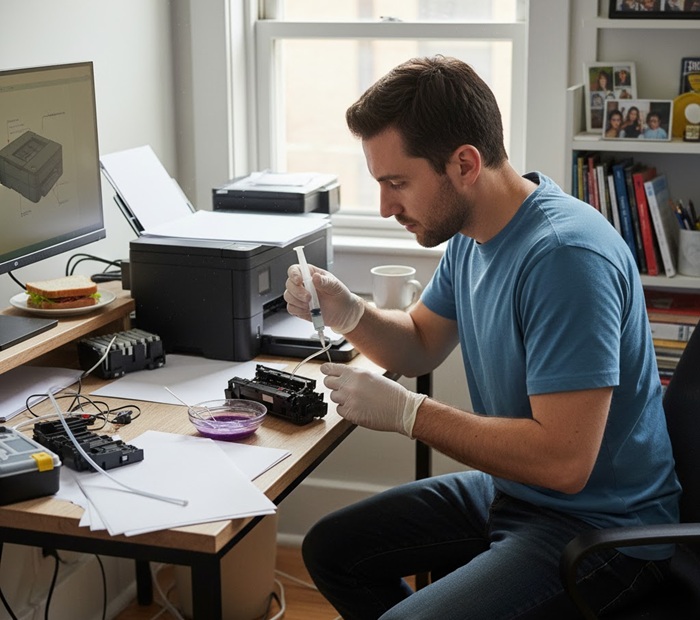
How to Fix Clogged Printheads or Bad Cartridge for Better Printing Quality?
If your printer is producing faded, streaky, or patchy prints, the culprit is often a clogged printhead or a dried-out ink cartridge.
While most printers offer an automatic cleaning function, it doesn’t always solve severe clogs. That’s when manual cleaning becomes your best option.
Step 1: Prepare the Essentials
Gather a few simple tools: a lint-free cloth or paper towel, distilled or filtered water (avoid tap water), and a small bowl. For more stubborn clogs, you can also use isopropyl alcohol or a commercial printhead cleaning solution.
Step 2: Remove the Cartridges
Turn off your printer and unplug it for safety. Open the cartridge access door and gently remove the ink cartridges. Be careful not to touch the copper contacts or printhead nozzles directly, as they’re delicate and prone to damage.
Step 3: Clean the Printhead or Cartridges
For Cartridges with Built-In Printheads (like HP or Canon): Dampen a lint-free cloth with warm distilled water and gently wipe the printhead area to remove dried ink.
Then, hold the cartridge so the nozzles face down on a damp paper towel for a few minutes to let the ink loosen up.
For Printers with Separate Printheads (like Epson or Brother): Remove the printhead assembly carefully (refer to your printer’s manual).
Soak the bottom of the printhead in a shallow bowl with warm distilled water or cleaning solution for 5–10 minutes. Blot gently with a dry lint-free cloth afterward.
Step 4: Dry and Reinstall
Let everything air dry completely—usually about 15–30 minutes—before reinstalling. Reinsert the cartridges and run a nozzle check or test print to verify improvement. You may need to repeat the process once or twice for best results.
Step 5: Prevent Future Clogs
To keep printheads healthy, print something at least once a week to keep the ink flowing. Always use genuine or high-quality compatible ink and store cartridges properly when not in use.
Manual cleaning takes patience, but it’s often enough to bring your printer back to sharp, vibrant life—without a costly service call. But if you think the manual cleaning isn’t your cup of tea, and you want something high-tech, precise, and fast, ultrasonic printhead cleaners are your solution.
The bottom line
Under normal working conditions, the printheads should serve you anywhere from 1.5 – 2 years. If you find quality issues in between (such as faded, spotty, or somewhat streaky prints), maybe it’s time to clean them.
Do not replace them until a message on your printer instructs you to do so. In most cases, simply cleaning them using an ultrasonic printhead cleaner can restore them again.
Remember that if your printer utilizes water-based inks, which can be effectively cleaned using standard methods, ultrasonic cleaning may be unnecessary. It is also important to take into account that the ultrasonic cleaning method could void the warranty of printheads still under coverage.
So, alternative cleaning techniques should be considered if you are working with newer printheads that contain sensitive electronics or specialized coating materials, as ultrasonic cleaning could potentially damage these components.