
Ultrasonic coin cleaners promise dazzling results—the kind that make even a centuries-old coin look like it just clocked out from minting duty.
As a collector, the idea is tempting. Who wouldn’t want their ancient treasures to shine like they’re ready for a museum display?
But here’s where things get interesting: ancient coins aren’t just metal discs; they’re delicate time-traveling artifacts with stories etched into every scratch and patina.
So, before you drop your 2,000-year-old denarius into a buzzing ultrasonic bath, it’s worth asking the real question—are you cleaning it, or are you erasing history?
Let’s break it down.
Is It OK to Clean Coins in an Ultrasonic Cleaner?
Cleaning coins in an ultrasonic cleaner can be a good option for modern, durable, circulation coins, and when done correctly, it offers several advantages.
Here are some key benefits:
- Non-abrasive cleaning: No physical rubbing means minimal risk of scratching the coin’s surface.
- Deep cleaning action: Ultrasonic waves reach small crevices, lettering, and textured areas that manual cleaning often misses.
- Time-saving efficiency: Ideal for cleaning large batches of common coins quickly and consistently.
- Less chemical exposure: Works effectively with mild solutions or even just water, making it safer for both coins and users.
- Consistent results: Every cycle delivers uniform cleaning, helpful for hobbyists managing multiple coins.
Overall, ultrasonic cleaners are a solid choice for everyday coins—but not recommended for rare or ancient pieces where patina preservation is crucial.
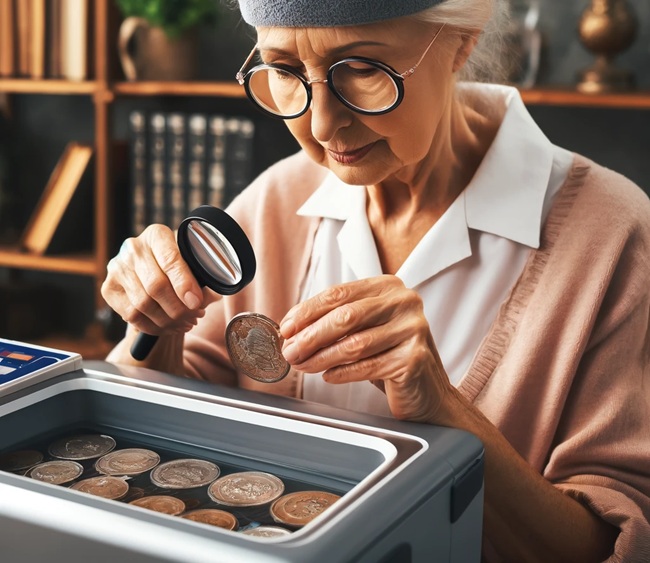
How to Give Your Coins an Ultrasonic Bath?
We may earn a small commission if you click and shop from the links on this page.
Manual cleaning of ancient gold and silver coins might not seem fancy enough for some, so those wanting a touch of “professionalism” often turn to ultrasonic cleaners.
These devices are compact powerhouses, packed with features like high-powered transducers, heating, and auto shut-off. They’re also budget-friendly, efficient, eco-conscious, and require almost zero upkeep.
Best of all, they excel at tackling stubborn grime and gunk, especially in those tricky nooks and crannies around inscriptions and intricate details.
Here’s a step-by-step guide that will help you to properly clean your coins in an ultrasonic cleaner device without ruining them:
- Pick the Mild Potion – Distilled water + dish soap works fine as an ultrasonic cleaning solution for coins. No bleach, no ammonia—unless you want regrets.
- Fill ‘er Up – Pour your solution into the cleaner’s tank. Stick to the fill line unless you enjoy cleaning up spills.
- Pre-Rinse the Loot – A quick rinse under warm water shakes off loose dirt and keeps the solution fresher.
- Basket, Not Bottom – Lay coins in a single layer in the basket. Piling them up = a recipe for scratches.
- Set It Smartly – Low heat (around 40°C) and short cycles (2–5 mins) keep delicate coins safe.
- Fire It Up – Start the cleaner and watch the magic happen—just don’t zone out completely.
- Rinse & Dry – Once clean, give your coins a freshwater rinse and pat dry with a soft microfiber cloth. No air-drying, unless you like water spots.
Best Ultrasonic Cleaners for Coin Cleaning at Home
If you’re looking for an ultrasonic cleaner for coins, the best options depend on factors like tank capacity, frequency, power, and additional features.
Here are some of the best ultrasonic cleaners for coin cleaning:
1- iSonic P4820-WSB
If your coins are looking like they’ve been on a thousand-year quest through dungeons and deserts, the iSonic P4820-WSB might just be your new best friend.
This 2.5L iSonic ultrasonic beast packs a punch, operating at 42 kHz—the sweet spot for shaking loose stubborn grime without turning your treasures into ghostly relics.
Armed with 110W of cleaning power, this cleaner means business. It comes with a built-in heater, which helps melt away years of gunk like a wizard casting a restoration spell.
The stainless steel tank adds durability, and the adjustable timer (5, 8, or 10 minutes) means you can set it and forget it—because let’s be honest, watching dirt dissolve is only fun for so long.
2- Magnasonic Professional Ultrasonic Cleaner
This compact yet mighty cleaner may not look like much, but with 42 kHz of ultrasonic waves, it sends dirt and grime packing—no harsh chemicals or elbow grease required.
With a 600ml stainless steel tank, this little workhorse is perfect for small batches of coins, jewelry, eyeglasses, and other delicate items.
Magnasonic cleaner also features preset cleaning cycles (90 to 480 seconds), meaning you can drop your treasures in, press a button, and let the magic happen. The digital display adds a modern touch, making it super easy to use.
3- CREWORKS 10L Ultrasonic Cleaner
This industrial-grade powerhouse delivers 40 kHz of ultrasonic magic, ensuring even the most stubborn grime and oxidation waves the white flag.
With a massive 10L stainless steel tank, this CREWORKS cleaner can handle bulk loads of coins, jewelry, tools, and even automotive parts. The 240W ultrasonic power combined with a 500W heater means it’s not just cleaning—it’s obliterating dirt at a microscopic level.
Plus, the adjustable temperature (0–80°C) and time settings (1–30 min) give you full control, whether you’re doing a light refresh or an archaeological-level restoration.
Coins That Can Be Safely Cleaned in an Ultrasonic Cleaner
If your coins need a deep clean without the elbow grease, an ultrasonic cleaner might just be your new best friend.
But before you go buzzing away decades (or centuries) of history, let’s talk about which coins can handle the shake-up—and which ones should be left alone.
1- Modern Circulating Coins (Pocket Change)
Got some grimy pocket change? No worries. Coins made of nickel, copper-nickel, or stainless steel (like U.S. quarters, dimes, and many modern foreign coins) can handle ultrasonic cleaning just fine.
Since their numismatic value is next to nothing, a little extra shine won’t hurt.
2- Bullion Coins (Investment Coins)
Gold and platinum bullion coins (think American Gold Eagles, Canadian Maple Leafs) are soft but naturally resistant to corrosion.
If you must clean them, stick to distilled water, keep it brief, and use low-intensity settings—less is more when dealing with precious metals.
3- Silver Bullion Coins (Proceed with Caution)
Silver coins, like American Silver Eagles or Austrian Philharmonics, can technically go in an ultrasonic bath, but only with distilled water or mild soap.
Silver loves to tarnish, and ultrasonic cleaning won’t always fix deep oxidation. Worse, harsh chemicals can leave ugly stains or pits. Proceed carefully!
4- Metal-Detected or Dug-Up Coins (a.k.a. The Dirty Bunch)
If you’ve unearthed some heavily corroded old buried or burnt coins, ultrasonic cleaning might help but don’t get too excited.
Use only distilled water—no fancy solutions—to loosen dirt without damaging the metal on those metal-detecting finds.
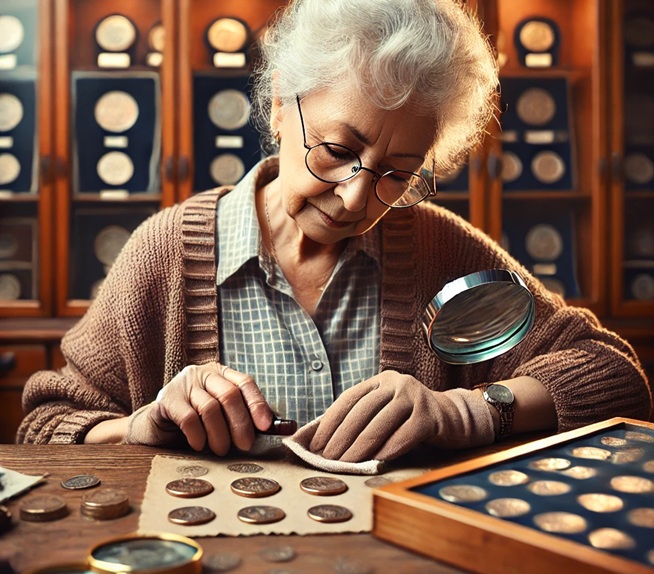
Risks of Using Ultrasonic Cleaner for Ancient Collectible Coins
Using an ultrasonic cleaner for coins sounds like a brilliant idea—until it isn’t. While it may leave your coins looking shiny, it can also leave collectors cringing.
Here’s why:
- The high-frequency vibrations can cause microscopic abrasions, quietly chipping away at your coin’s numismatic value.
- Even worse, it might strip off that coveted natural patina—something serious collectors actually want.
- And if you throw in the wrong cleaning solution it can easily lead to discoloration, corrosion, or other chemical disasters.
There is also a risk of scratches if multiple coins are cleaned together or improperly positioned in an ultrasonic cleaning device, as they may rub against each other.
Here’s a list of coins that should stay far away from ultrasonic cleaners:
1- Rare or High-Value Numismatic Coins
Got a coin that’s worth more than pocket change? Even a minor cleaning can send its value plummeting.
If you’re dealing with a rare or historically significant coin, do yourself (and your wallet) a favor—consult a professional before even thinking about cleaning it.
2- Copper Coins (Pre-1982 Pennies, Antique Copper Coins)
Copper is a diva. It’s soft, reactive, and highly sensitive. Ultrasonic cleaning can cause discoloration, pitting, and ruin that rich patina that antique collectors adore.
Also, if your coin is rocking decorative finishes, enamel, or a splash of paint, keep it far away from an ultrasonic cleaner.
Basically, your old pennies will thank you if you just let them be and don’t expose them to high-frequency vibrations that can strip off the coatings faster.
3- Roman Coins (Especially those Ancient Bronze, Silver, and Gold Beauties)
The charming patina, the result of centuries of history, isn’t just for show—it’s a big part of their authenticity and value. Ultrasonic cleaning can strip it away faster than a pickpocket in ancient Rome, leaving the coin devalued and historically wounded.
If your Roman relic is caked in dirt or corrosion, a soak in distilled water and a gentle scrub with a soft toothbrush is the way to go.
For the really stubborn stuff, professional conservators opt for meticulous mechanical cleaning under magnification—no harsh chemicals, no ultrasonic mayhem, just steady hands and patience worthy of an emperor.
Things to Care When Cleaning Your Coins in Ultrasonic Machine
Although the sonic machine is safe to use, there are certain things you should keep in mind before you clean your antique coins in them.
This will help in avoiding the possible damage that can devalue your coins forever.
✅ The first and most important thing while cleaning your ancient coins in an ultrasonic cleaner is – always to use distilled water cleaning. Tap water contains minerals that may react and devalue your coin instead of cleaning.
✅ The body of these cleaning devices is constructed out of stainless steel to keep the frame safe and durable. Hence make sure that you put sufficient water and solution into the bath tank that can submerge the coins completely.
If not properly submerged, your coins can collide with the tank surface and get spotted or damaged. Placing the coins on the tank bottom can also impose a similar risk, it is best to use a plastic basket that comes included with many ultrasonic cleaning devices.
✅ Always try to under-clean the coins in an ultrasonic coin-cleaning machine. Over-cleaning of antique coins (made up of metals like copper, brass, bronze, etc.) can impose a risk to the coins.
✅ When storing your collectible coins (after the clean-up), always use an airtight container that can prevent them from getting damaged due to environmental exposure around them.
Things you should not do while cleaning the coins at home are:
❌ Don’t rub your ancient coins while cleaning. As this may devalue (or completely damage) your coins, you should avoid it at any cost. If needed, you can wipe it with a soft clean cloth.
❌ It is always advised not to use hard abrasive cleaning agents such as Brasso. This can damage the coin by scratching the surface of the coin.
❌ Also, take care that you do not touch the edges of the coin while cleaning, as it can scratch. On a similar note, do not ever use any low-quality cleaners as they may harm your gold coins easily.
Methods to Clean Your Collectible Coins without an Ultrasonic Device
Cleaning antique coins can be challenging – one wrong step and your coins are completely damaged and devalued.
The good news is that different methods can help clean your vintage coins to bring back their beauty and value.
So, if you are among the hobbyists who want to bring out the luster back of your old pennies and antique Roman coins without risking them by putting in any automatic machine, here we mention some different ways for you.
Depending on the condition of the coins, the level of dirtiness, and the cleaning you desire to have, you can choose the method that best suits you.
Make sure that you follow the steps and do all the cleaning patiently or else you can lose your investment forever.
Method 1: Simple Washing
Cleaning your old coins and pennies with water and soap is the simplest method you can try. The process is safe, and you do not have to spend huge bucks on it.
You can even try this method for cleaning the unearthed or dug-up coins (gold, silver, copper, bronze, nickel, and brass) naturally, which you may have found buried in the dirt.
To start with, follow the steps below:
Step 1: Sort your dirty coins into three categories. The first shows fine details, the second shows only minor details, and the third shows no detailing at all.
Step 2: Start cleaning the coins (by using a piece of rag) that are still showing the details as they need the least amount of work.
Step 3: When you have removed the accumulated dirt and debris, it’s time to soak them in distilled water for a few days. This will loosen up the dirt and other materials on your coin that are not removed.
Make sure that you do not use tap water as it may contain minerals and ions that can inhibit the cleaning process.
Step 4: After soaking for a few days, inspect the coins and scrub them using a soft toothbrush to remove the dirt, if any, left behind.
If soaking in plain water does not work, you can add some good quality liquid soap to get the coins cleaned better.
Step 5: After you have the cleaned coins, you need to gently scrub them with a soft-bristle toothbrush one last time.
Use a bit of dish soap and rinse them under running water. If possible, use organic soap, which is made up of organic/natural items and is best suited for cleaning old coins at home.
If water and soap do not work, you can wash your coins with olive oil. Place the coins in a container filled with olive oil (for a week or two). And then wash them clean with soapy water.
Method 2: Using At-Home Cleaning Tools
Washing the dirty commemorative coins may not work if the antique gold or silver coins carry lots of grime, oil, or gunk accumulated over the years.
For cleaning them mechanically, you may need to use tools such as a magnifying glass, x-acto knife, plastic knives, curved blades, toothpicks, etc.
After collecting the above tools in your home, start with the cleaning process as below:
Step 1: Begin with cleaning the dirty coins using a dental pick. Do not scrap with the pointed tip.
Rather turn the pick sideways and try removing the dirt and grime by scrubbing the pick over the coin in circular motions.
Step 2: If the accumulated debris is too heavy to clean with a toothpick, you can use an X-acto knife or a curved blade to scrape the coin.
Make sure that while cleaning, you hold the coin in your hand and go very slowly in circular motions.
Step 3: After you have cleaned a bit of dirt, use a magnifying glass (a microscope or a table magnifier) to inspect the fine details on the coin.
Depending on the level of dirt and grime, different areas on your coin may need different tools and pressure applied. Using a magnifier will help you to know where exactly you need to clean the coin using your tools.
Step 4: After you have cleaned most of the dirt on the coin, as the last step, you can now apply a bit of olive oil. This will act as a lubricant to loosen the dirt that is not yet cleaned.
After a few minutes, repeat the scraping process as above, and then wipe clean the coin using a soft cotton cloth or a piece of rag.
Method 3: Deep Cleaning the Coins with Chemicals
Deep cleaning of the ancient coins (using the chemical method) is needed when the coins are extremely dirty and are hard to clean using the above methods.
Depending on the level of cleaning you desire to have and the condition of your coins, you may use one of the following chemical-based methods.
a. Calgon water softener
Soak your coins in a Calgon water softener. Depending on the dirt level on your coins, you can either use a full-strength solution or a solution diluted with water. Leave the coins in the solution for anywhere between 1 to 15 days.
Be sure to inspect the coins daily, making sure that the Calgon solution does not strip the coins. Scrub them gently with a toothbrush daily to remove the softened debris.
b. Lemon juice and vinegar
Some of the chemicals that have worked to remove the corrosion off coins are coke, salt, lemon juice, vinegar, baking soda, bleaching powder, acetone, hydrogen peroxide, and Noxon brass polish.
Lemon juice and vinegar are the safest of all the acid chemicals and can be used without much risk for cleaning your old coins. You can make a diluted solution of water with lemon juice or vinegar.
Let the coins soak in it for about 10-15 minutes in a shallow dish. Then remove it and gently brush using a soft toothbrush to restore the shine back.
If you use any other chemical substances for cleaning the lime deposits on coins, make sure that you test and clean with only one coin without exposing them in bulk to the chemicals.
It’s recommended that you use this method as a last resort if every other method fails to work.
c. Electrolysis method for advanced users
Unlike the patience-testing methods of soaking coins in water or oil for weeks, electrolysis zaps away grime in mere minutes—if done correctly, of course.
Here’s the drill: wrap your coin in aluminum foil, run an electric current through it, and let science do its magic.
For this method, you’ll need an old power adapter, a battery or transformer, some wire, and a tank to host this little chemistry experiment.
Feeling extra DIY? A mix of salt, water, and an old mobile charger can also do the trick.
But before you get all mad scientist, be warned—electrolysis is a double-edged sword. While it can restore a coin’s lost glory, it can just as easily strip away its precious patina, leaving it looking more wrecked than restored.
Worse, if your coin has been through rust, corrosion, or even fire, electrolysis might leave behind unsightly pits, scratches, or holes.
So, if you decide to give your old coins an electric spa day, keep a close eye on them—because once the damage is done, there’s no hitting the undo button.
The Bottom Line
Valuable, rare, or historically rich coins deserve expert care—one wrong move, and you might clean away both history and worth.
For modern, non-valuable, or heavily encrusted finds, ultrasonic cleaning can be an option, but only with distilled water and low settings.
But as a golden rule, if you’re unsure, put the scrub brush or ultrasonic machines down. A little dirt is far better than irreversible damage.
At the end of the day, some coins shine with a good cleaning—others lose their soul. So, when in doubt, let history stay untouched.