
Purchasing a new set of hair clippers is an investment, as you will likely expect to use the device for a long time. But hoping you will make the best out of it is not enough.
Your clippers need a bit of attention on your part so that you boost your grooming opportunities for an extended period.
Similar to other grooming devices, cleaning this machine is more than necessary.
Up next, you will discover why you need to clean the blades and how to do it like a professional. Basically, if you are looking for more suggestions on cleaning clippers and their blades, this is the article for you.
Deep Cleaning Hair Clipper Blades Step-by-Step
Sanitation and sterilization are essential for hair clipper blades as they will then have a better life span, remaining sharper and rust-free for longer. Plus, regular maintenance can prevent bacteria buildup, along with several other diseases.
Proper cleaning can be done by start gathering some cleaning supplies which include:
- Cleaning brush
- Screwdriver
- Blade-cleaning solution
- Warm water mixed with vinegar
- Clean and dry soft cloth
- Hair clipper oil
After you gather the supplies, let’s see how you can sanitize your hair clipper as a professional does…
Step 1 – Remove dirt and hair clippings
Hair clippers can get a lot of buildup after every haircut which can lead to blade damage, altering the functionality of the motor.
Thus, to better the performance and protect your device, you should start your maintenance routine by removing dirt and hair clippings.
If your device has a separate storage area for debris, you can simply empty it. But if you have a tool without such storage in its design, you can use a comb or cleaning brush to remove hair and make sure there is no buildup left.
Keep in mind that you should never clean your hair clipper blades with a cotton ball.
Step 2 – Remove detaching parts
The second step is to look at your hair clipper model and determine what parts are detachable.
Keep in mind that different manufacturers use distinct designs, meaning you won’t be able to disassemble your tool in the same way for all types of devices.
Our tip is to check the user’s manual for your hair clipper and start removing parts such as the shaving head or the foil.
Step 3 – Start the cleaning process
Always remember that the blades come in direct contact with hair and scalp. This means unclean blades are filled with germs and bacteria that can promote skin infections.
So, after disassembling the trimmer device, you should start disinfecting it using any of the four mentioned ways:
a) Use a clipper spray
The fastest and most straightforward way to sterilize your hair clipper blades and remove any buildup of bacteria is with the help of a specially designed clipper spray or a lube.
Most of the clipper spray, lubricating oil, or lube are non-detergent-based and are designed to significantly prolong the blade life. These are excellent for preventing rust and mold, too.
You can find these products in almost any shop, and you will most likely see any barber applying it on the trimmer shortly before using the device on a client.
b) Use white vinegar
Of course, if you are looking to use ingredients available in your kitchen, you can clean and disinfect your razor or hair clipper blades with white distilled vinegar. To do this, you need to:
- Take all removable parts of your device and soak them in warm water for up to 10 minutes
- Use another clean bowl to mix equal quantities of vinegar and water
- Place the blades and shaving head in this mixture for no more than 20 minutes
- Wipe the parts with a dry cloth and allow them to air-dry
- When the blades are dry, oil them and reattach them to your device.
c) Use rubbing alcohol
The general rule says that if you use a standard 70% isopropyl alcohol, you will manage to sterilize your blades, as bacteria cannot thrive with this concentration.
To disinfect your hair clipper blades with alcohol, you need to:
- Pour ¼ cup of alcohol into a bowl
- Soak the blades, and avoid other parts of your device from touching the alcohol
- Allow the blades to soak for around 30 seconds
- Afterward, wipe off any liquid and allow the blades to air-dry
- When the blades are dry, oil them and reattach them to your device.
Of course, specially manufactured shaver blade disinfectant is useful, too. But make sure you purchase qualitative solutions to prevent rust or sharpness loss after the cleaning process.
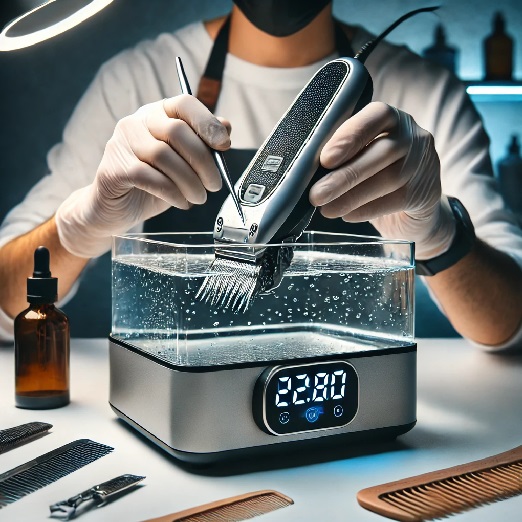
d) Use an ultrasonic cleaning machine
Ultrasonic cleaning device at home offers brilliant technology when it comes to cleaning valuable things like antique coins, jewelry, watches, and even your hair clipper blades.
When you switch ‘On’ the clipper blade cleaning machine, ultrasonic vibrations create tiny bubbles that release high energy and cleaning power. And you will see that the submerged clipper blade is getting cleaned slowly and gently.
The good thing is the dirt from the shaver blade separates off into the water within a few minutes of the cleaning cycle, saving you from all the hassle of a time-consuming job.
Since the ultrasonic blade cleaning device uses only water and ultrasonic waves, no contact with chemicals is involved in this cleaning method.
Step 4 – Take care of the comb attachments, too
Many people forget about cleaning the comb attachments. But this is a necessary step, as the entire hair clipper gets in contact with bacteria and residue from hair and scalp.
Besides, you have to remove the grease that gathers in the nooks to ensure the device is adequately sterilized.
To clean your comb attachments, you should:
- Take some lukewarm water and mix it with a mild soap
- Rinse the combs by hand and position them under running tap water to make sure any solvent is removed
- Place the combs on a cloth and let them air-dry for at least half a day
Step 5 – Don’t forget to oil the rusty hair clipper blades
After carefully cleaning the blades, you should always lubricate them. This step is necessary to make sure you have sharp and strong moving blades that don’t scratch the skin while using.
To oil the clipper blades, follow these steps:
- First of all, verify if you cleaned the blades correctly. You should oil the blades only after you sterilized them and allow them to dry
- You should position the clipper downward and make sure there is a recipient underneath it for the oil to pour into
- Pour around three drops of oil on the blades, and be careful not to slip too much product
- To make sure the oil is distributed evenly, switch on the device. The fast rotation of the blades will do the job for you and allow the oil to reach every inch of your blades.
- Turn off the device and remove with a cloth any excess oil.
Our advice is to verify the manufacturer’s instructions for oiling the blades of your product. Depending on the model, there might be particular indications regarding how to lubricate metal moving parts for your device.
Also, some products might require a specific lubricating oil, so it is best to verify what are the maintenance requirements for your hair clipper model and whether you were provided with a bottle of clipper oil before when you purchased a professional hair clipper.

How Often to Clean Your Hair Clipper Blades?
Cleaning your hair trimmer blade after every use is a good idea. However, I usually oil and sharpen my Wahl clipper blade once in 6 months.
Depending on your use, you can also deep clean (oil and sharpen them) using an automatic cleaning device every 3-4 months.
Remember, clipper blades usually last for about 6-8 months under normal working conditions. For many, a properly cleaned and oiled blade has lasted for even about 12-15 months.
According to Wahl, the lifetime of the blades will generally depend on how often you use them and how you take care of them. With proper maintenance, you may need to replace the blades once in 2-3 years.
If required you can easily sharpen your clipper blades within a few minutes at home.
To sharpen, first, remove the blades from your clipper and then use a 4000-grit coarse sharpening honing stone to get them sharpened.
These stones are easily available at a hardware store nearby. As an alternative, you can also use a hair clipper blade sharpening machine that is available for sale at online stores.
Signs Your Clipper blades and Trimmers Need Cleaning
Not sure when it’s time to clean your clippers? Watch for these warning signs—your tools are usually the first to complain:
- Uneven or tugging cuts: Hair starts pulling instead of gliding through smoothly.
- Unusual noises: Loud buzzing, rattling, or sharp tones during use.
- Motor inconsistencies: Power dips, surges, or random stalling while cutting.
- Loose parts: The blade or lever feels unstable, misaligned, or slips out of place.
- Excessive heat: Blades heat up faster than normal.
- Poor cutting performance: Hair bends, folds, or requires multiple passes.
- Visible buildup: Rust, grime, or product residue on the blades.
Don’t wait for these issues to worsen. After every use, brush off hair and debris, then apply a few drops of clipper oil. For daily users, a deeper clean and fresh lubrication once a week will keep your tools running sharp and smooth.

Do’s and Dont’s About Cleaning Your Hair Clipper Blades at Home
Now that you’ve reached the end of our guide on how to clean rusty clipper blades, let’s sum up the essential tips professionals say you mustn’t overlook:
DO’s
1- Do frequent clippers maintenance, based on how often you use the device. Generally, you should clean them once a week or after every fourth trimming session. This way, you will prevent bacteria or debris buildup.
2- Always make sure the clippers are unplugged when cleaning and that you don’t submerge any electrical components in the water.
3- Always use the cleaning brush offered by the manufacturer. If you didn’t receive one, you should purchase a brush designed for hair clippers. In some cases, a soft toothbrush can be useful, too.
4- After cleaning, you should always allow the clippers to dry appropriately. Not doing so can damage your hair clipper blades.
5- You should always verify how the clipper is reassembled correctly. Aligning the blades as instructed and closing the head tightly will enable optimum functionality. Otherwise, you risk damaging your device beyond repair.
Don’ts
1- Do not compromise on the quality of the clipper oil. You should always purchase hair clipper blade oil for the best maintenance results. Other oils can damage beyond repair your blades.
2- Do not use excessive amounts of oil. Lubricating the blades can be done only with a couple of drops. Adding too much can deem the product ineffective.
3- When using an automatic cleaning device, do not use solutions such as Dettol or alcohol in the ultrasonic machines as it can affect its efficacy and can also damage the machine.
Blade Cleaning vs. Buying a New Trimmer: Making the Right Choice is Important
Knowing whether to clean your clipper blades or replace the entire trimmer can save you money, improve performance, and extend the lifespan of your grooming tools.
In most cases, clippers and trimmers don’t fail overnight—small signs build up over time, and understanding them helps you make the right call.
Start with blade cleaning, which should always be your first step.
Blades naturally accumulate hair, oils, skin particles, and product residue. This buildup causes tugging, uneven cuts, overheating, and noisy operation. A thorough cleaning—paired with proper lubrication—can restore cutting performance almost instantly.
If the blades still feel sharp, align correctly, and show no major rust or chips, cleaning is all you need. Regular maintenance not only preserves the blades but also protects the motor from unnecessary strain.
However, there are moments when buying a new trimmer becomes the smarter, safer choice.
If your blades are severely rusted, chipped, bent, or have lost their edge beyond sharpening, replacing them may not solve the issue—especially if the motor struggles, the battery fails to hold a charge, or the device overheats consistently.
Modern trimmers are designed with precision components, and sometimes the internal wear is simply too advanced for maintenance to fix.
The Bottom Line
Properly cleaning hair clipper blades is essential for maintaining their performance, extending their lifespan, and ensuring hygiene.
Whether you’re a professional barber, pet groomer, or a DIY enthusiast, following a regular cleaning routine minimizes wear, prevents rust, and ensures precision cuts.
By disassembling the blades, removing debris, disinfecting, and oiling them, you not only protect your investment but also create a safe and sanitary experience for yourself and your clients.
Prioritize cleanliness and care after each grooming session, and your clippers will deliver consistent results for years to come.